
StarPhish is a workflow automation platform designed to streamline repetitive processes and improve operational efficiency. It includes a visual builder that uses modular, drag-and-drop blocks, making it straightforward to define event triggers and automated actions without requiring technical expertise.
The platform supports real-time automation, such as sending alerts, assigning training, or modifying access permissions, allowing organisations to respond promptly to specific events.
This knowledge base article explains how to access and use StarPhish.
How to access StarPhish.
To access StarPhish, you must have permission for both the USP and StarPhish. If you are unable to see either option, your account may not yet be enabled for this feature. Please contact your account manager to request access.
How to Generate an API Key.
Before accessing the USP portal, you will need to generate an API key. Follow the steps below:
-
Log in to Phishing Tackle, and from the left-hand menu, select Organisation. Then click Settings.
- Then, in the settings menu, select the option at the bottom named 'API'.
- Once you have selected the API option, the screen shown above will appear. On this page, select 'Generate API Key' and click 'Save'. Once this is done, you will be able to access the USP.
How to access the USP menu
Now that your API key has been generated you can follow the steps below to access the USP.
- From the Phishing Tackle platform, click the drop-down arrow next to your name in the top-right corner.
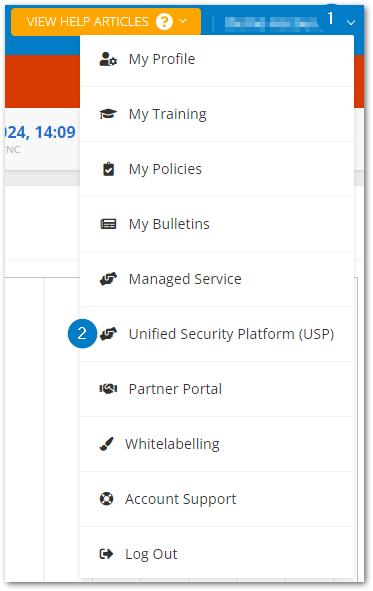
- Select 'Unified Security Platform (USP)' from the drop-down menu.
Managing and editing workflows
-
Automations
- You can click on 'Automations' to create new automations, access previously created ones, and view automation logs.
-
View All
- This window displays all workflows, both active and disabled, created within the StarPhish application.
-
Creating a New Workflow
- Click the “+ New” button at the top right of the automations window.
- You can use the StarPhish Toolbox to build your workflow. Descriptions of triggers, actions, and conditions are provided below.
-
Delete workflow
- Click the bin icon in the actions section of the automation window. You will be prompted to confirm, as deleting the workflow also removes the associated automation.
-
Pausing or Enabling a Workflow
- It is advisable to pause a workflow before modifying it. Pausing stops the workflow from running and ensures changes can be made safely.
-
Editing a Workflow
- If you would like to edit a workflow, click on the blue link/name of the workflow you wish to edit.
StarPhish Automation Logs
Within the USP, you can debug workflows to identify triggers, actions taken, and their outcomes. This is helpful for verifying that workflows perform as expected.
Logs for all workflows are accessible here. You can search for specific workflows and sort logs by Event Type or Timestamp for easier navigation.
StarPhish Toolbox
When using StarPhish, you can build automation workflows either manually or with the AI Builder. Below is an overview of available tools and their functions.
Triggers
Only one trigger can be used per automation. Triggers initiate the workflow and connect to an action. The screenshot below shows the available triggers.
-
Recipient Added
- This trigger will enable time-saving across the Phishing Tackle platform, as it will run each time a new recipient is added to your address book.
-
Recipient Archived
- This trigger will run when a recipient enters an archived state. This can be used to remove tags from a recipient, which can be useful as it helps reduce any possible campaign or reporting errors.
-
Recipient Breached
- This trigger will activate when a recipient is detected in a known data breach. It can be used to initiate security alerts or awareness training, helping to proactively respond to potential threats and minimise risk exposure. For example, an action could automatically notify an admin or assign additional training to the affected recipient.
-
Recipient Phished
- Using this action, you can create further steps in the process to align with what you, as the admin/creator of this automation, would like to happen if a recipient is phished.
-
Training Started
- This trigger uses the start date of a training course which can be used to enable the primary admin to configure options within the Actions section of the toolbox. e.g. Send a teams/slack or email to the recipients or managers notifying them of the start of training.
-
Training Ended
- This trigger uses the start date of a training course, which can be used to enable the primary admin to configure options within the Actions section of the toolbox.
-
Phishing Started
- Using this trigger, a "Phishing" campaign that you have selected to be launched will activate. To use this, you must first have the campaign you want to use already created within the platform.
-
Phishing Ended
- This trigger can be used to enable the primary admin to configure options for when a "Phishing" campaign has ended. For example, send a Slack/Teams message to a manager informing them that the "Phish" campaign is now complete.
-
Send Test Campaign
- This trigger is activated when a phishing template is sent using the “Send test email to me” feature within Phishing Tackle. It can be useful during campaign setup, allowing admins to build workflows for internal testing or notifications. You can find further details on how to use this trigger in our guide here.
-
Recipient tag added
- When a tag is assigned to a recipient either manually, through bulk adding tags to recipients, or using another StarPhish workflow, you are able to archive the recipient, add them to a 365 group, remove them from a 365 group, and send notifications.
-
Domain registered
- This trigger synchronises CatPhish with StarPhish, and automatically initiates a workflow when a new domain is registered within your account. For more information on the domain registered step, please click here.
Actions
Actions are carried out in response to triggers. For example, once a trigger occurs, the corresponding action will be executed automatically. The available actions are listed below. Actions can also be used in combination with ‘IF’ statements to apply conditional logic.
-
Add Recipient Tag
- Adds a tag to a recipient's account. Tags are used to group similar recipients together, making it easier to organise, filter, and manage them.
-
Remove Recipient Tag
- Removes a tag from a recipient's account.
-
Archive Recipient
- Moves the recipient to the archived section of the recipient address book.
-
Unenroll Training
- Unenrolls recipients training based on the selected trigger. For example, if a recipient fails a Phishing Campaign.
-
Clone Campaign
- Clones your selected Campaign on your selected date and time.
-
Add To 365 Group
- Adds your selected recipients to a Microsoft 365 group.
-
Remove From 365 Group
- Removes your selected recipients from a Microsoft 365 group.
-
Remove from 365 agreement
- Removes your selected recipients from a Microsoft 365 agreement.
-
Wait until
- Allows you to select specific dates and times for sending notifications.
-
Time Delay
- Adds a time delay to your selected trigger and action. This is available in seconds, minutes, hours, days, weeks and months.
-
For Each
- Each step relates to each recipient inside of the 'for each'. This only works for course and campaign triggers.
Conditions
Conditions are used to add flexibility within the StarPhish platform and are combined with actions to perform specific functions. For example: If a recipient has been phished, then enrol them in training and add a tag to their recipient account.
Notifications
Notifications allow alerts, updates, or reminders to be sent to recipients or managers. Note: some notification functions may require additional setup or API integration.
-
Send Email
- This will use the SMTP integration of the platform to send emails to specified groups or individuals.
-
Send Teams
- This feature within StarPhish makes use of the PhishTAIL application within Microsoft teams. To send a notification to a recipient. Our knowledge base article explains how to configure PhishTAIL.
-
Send SMS
- Sends a text message to a the configured recipient.
-
Send Slack
- This uses the Slack API, which is already integrated within the platform, to push Slack messages to defined users or recipients. Our knowledge base article here explains how to integrate Slack.
Please let us know if you require any further assistance, you can contact our support team by clicking here. Or by sending an email to support@phishingtackle.com